Have you ever found yourself in a situation where your beloved leather weightlifting belt has seen better days? The wear and tear from intense workouts can take a toll on even the highest-quality belts, leaving you wondering if it’s time for a replacement. But what if I told you that you could actually repair your leather weightlifting belt and extend its lifespan without breaking the bank?
In this comprehensive guide, I will walk you through the step-by-step process of repairing a leather weightlifting belt on your own. From diagnosing common issues and gathering the right tools to customizing the repair to match brand-specific designs, I’ll cover everything you need to know to bring your worn-out belt back to life. Don’t let a small tear or crack get in the way of your weightlifting goals – it’s time to take matters into your own hands!
Key Takeaways:
- Repairing a leather weightlifting belt can save you money and extend its lifespan.
- Regular maintenance is essential for preserving the performance and durability of your belt.
- Accurately diagnosing the issues and gathering the right tools and materials are crucial for a successful repair.
- Following a step-by-step guide will help you fix small tears and cracks in your weightlifting belt.
- Proper conditioning and customization techniques can further enhance the longevity and functionality of your repaired belt.
Introduction to Leather Belt Repairs for Weightlifters
As a weightlifter, your leather belt is an essential piece of equipment that provides support, stability, and protection during intense workouts. However, over time, your weightlifting belt may experience wear and tear, compromising its effectiveness and longevity. That’s where leather belt repairs come in. Instead of replacing your beloved belt, you can opt for DIY repairs to restore its functionality and extend its lifespan.
Leather belt repairs are vital for weightlifters for several reasons. Firstly, they allow you to address common issues that weightlifting belts may encounter, such as tears, cracks, or damaged stitching. By fixing these problems, you can ensure that your belt provides the necessary support and protection needed during your weightlifting sessions.
DIY repairs also offer a cost-effective solution. Instead of purchasing a new weightlifting belt, which can be quite expensive, you can invest a fraction of that cost in repair materials and tools. Repairing your belt not only saves you money but also allows you to customize the repair to your liking, retaining the familiarity and comfort of your trusted gym companion.
Moreover, there is a sense of satisfaction that comes with fixing your own gym equipment. As a weightlifter, you understand the dedication and hard work that goes into your training. Repairing your leather belt adds another layer of accomplishment, showcasing your resourcefulness and commitment to maintaining your gear.
The Importance of Regular Maintenance for Weightlifting Belts
Regular maintenance is essential for preserving the performance and longevity of your weightlifting belt. Proper care and attention will ensure that your belt remains in optimal condition, providing the necessary support and protection during your weightlifting sessions. In this section, I will emphasize the importance of cleaning, conditioning, and inspecting your leather belt regularly. Additionally, I will provide tips on how to properly store your belt when not in use to prevent damage and ensure its durability.
Cleaning Your Weightlifting Belt
Cleaning your weightlifting belt is an essential part of regular maintenance. Sweat and dirt can accumulate on the surface of the belt, leading to unpleasant odors and potential degradation of the leather. To clean your belt:
- Wipe the belt with a damp cloth to remove any surface dirt.
- Use a mild soap or leather cleaner to gently clean the belt.
- Rinse the belt thoroughly with water.
- Allow the belt to air dry completely before using or storing it.
Regular cleaning will not only keep your belt looking and smelling fresh but also help prevent the growth of bacteria.
Conditioning Your Weightlifting Belt
Conditioning your weightlifting belt is crucial for maintaining the flexibility and suppleness of the leather. Leather is a natural material that can dry out and become stiff over time. Conditioning your belt helps to preserve its integrity and extend its lifespan. To condition your belt:
- Choose a high-quality leather conditioner.
- Apply a small amount of the conditioner to a clean cloth.
- Gently rub the conditioner onto the belt, ensuring even coverage.
- Allow the conditioner to penetrate the leather for the recommended time.
- Wipe off any excess conditioner with a separate clean cloth.
Regular conditioning will help keep the leather soft and prevent it from cracking, ensuring your weightlifting belt remains in excellent condition.
Inspecting and Storing Your Weightlifting Belt
Regular inspection is essential for identifying any signs of wear, weakness, or damage in your weightlifting belt. Before and after each use, take the time to examine your belt for any of the following:
- Cracks or tears in the leather
- Splits or separations in the stitching
- Loose or damaged buckle
- Any other visible signs of wear
If you notice any issues, it is important to address them promptly to prevent further damage. Additionally, when the belt is not in use, make sure to store it properly to maintain its shape and quality. Here are some tips for storing your weightlifting belt:
- Avoid exposing the belt to direct sunlight or extreme temperatures.
- Hang the belt on a sturdy hook or lay it flat in a clean, dry area.
- Keep the belt away from sharp objects or heavy weights that could cause damage.
- Avoid folding or bending the belt, as this may lead to permanent creases or cracks.
By following these maintenance practices, you can ensure that your weightlifting belt remains in excellent condition, providing optimal support and safety throughout your weightlifting journey.
Diagnosing Common Issues with Leather Weightlifting Belts
Before starting the repair process, accurately diagnosing the issues with your leather weightlifting belt is crucial. In this section, I will guide you through the process of assessing the extent of damage and identifying the specific type of repair needed.
Assessing the Extent of Damage
To assess the extent of damage to your leather weightlifting belt, carefully examine the belt for any visible signs of wear and tear. This may include small tears, cracks, or other forms of damage. Inspect both the surface and underside of the belt to ensure a thorough evaluation.
Pay close attention to the following areas:
- Strap: Check for any fraying or weakening of the straps.
- Buckle: Examine the buckle for any signs of damage or malfunction.
- Stitching: Inspect the stitching for loose threads or unraveling.
- Leather surface: Look for any scratches, cuts, or other visible imperfections on the surface of the belt.
By thoroughly assessing the extent of damage, you can determine the appropriate course of action for repairing your leather weightlifting belt.
Identifying the Type of Repair Needed
Once you have assessed the extent of damage, the next step is to identify the specific type of repair needed for your leather weightlifting belt. The type of repair required will depend on the nature and severity of the damage.
Common types of repairs for leather weightlifting belts include:
- Patching small tears or cracks in the leather.
- Restitching loose or broken seams.
- Replacing damaged or faulty buckles.
- Conditioning and reconditioning the leather to restore its strength and flexibility.
By accurately identifying the type of repair needed, you can gather the necessary tools and materials and proceed with confidence in restoring your leather weightlifting belt to its optimal condition.
Gathering the Right Tools and Materials for Leather Repair
To successfully repair your leather weightlifting belt, you will need the right tools and materials. Here is a comprehensive list of all the necessary items:
- Leather adhesive: A strong adhesive specifically formulated for leather repair.
- Needle and thread: High-quality needles and strong polyester or nylon thread for stitching.
- Sandpaper: Fine-grit sandpaper to smooth rough edges and prepare the surface.
- Leather conditioner: A conditioner to nourish and protect the repaired area.
- Scissors: Sharp scissors to cut any excess material.
- Clamps or heavy objects: These will be useful for holding the repaired area in place while it dries.
- Leather patch: If necessary, have a leather patch on hand to cover larger holes or extensive damage.
It is important to use high-quality products for effective repairs. Substandard materials may not provide a long-lasting solution and could compromise the integrity of your weightlifting belt.
If you don’t have these materials at hand, you can easily find them at your local craft store or order them online. Now, armed with the right tools and materials, you are ready to begin repairing your leather weightlifting belt.
Remember: Using the correct tools and materials is essential for a successful repair. Don’t compromise on quality!
Repairing a Leather Weightlifting Belt: Step-by-Step Guide
Repairing a leather weightlifting belt is a simple and cost-effective way to extend its lifespan and get it back to optimal condition. By following this step-by-step guide, you can restore your weightlifting belt to its original functionality. Remember, taking care of your equipment is essential for maintaining your performance and safety during workouts.
Here’s how to repair a weightlifting belt:
Step 1: Cleaning and Preparing the Damaged Area
The first step is to clean the damaged area of your weightlifting belt. Gently wipe away any dirt or debris using a damp cloth. Make sure the surface is dry before proceeding. Then, use sandpaper to smooth out the edges of the damaged area, ensuring a clean and even surface for the repair.
Step 2: Applying a Leather Repair Compound
Once the damaged area is prepped, it’s time to apply a leather repair compound. Choose a high-quality adhesive specifically designed for leather repair. Apply a small amount of the compound to the damaged area, spreading it evenly with a spatula or your finger. Press the edges of the tear or crack together to ensure a secure bond.
Wait for the repair compound to dry according to the manufacturer’s instructions. This may take a few hours or overnight, depending on the product used. Avoid using the belt during this time to allow the repair to fully set.
Step 3: Drying and Conditioning the Repaired Belt
After the repair compound has dried, it’s essential to properly condition your weightlifting belt. Apply a leather conditioner or oil to the entire belt, focusing on the repaired area. This will help restore moisture and flexibility to the leather, preventing future cracks or tears.
Use a clean cloth to evenly rub the conditioner or oil into the leather. Allow the belt to air dry for the recommended time before using it again. Make sure to store your belt in a cool, dry place to prevent further damage.
Repairing a leather weightlifting belt is a rewarding DIY project that can save you money and enhance the lifespan of your equipment. By following these step-by-step instructions, you can bring your weightlifting belt back to life and continue to enjoy its support and durability during your workouts.
Evaluating the Condition of a Worn Leather Belt
Inspecting your worn leather weightlifting belt regularly is crucial for its maintenance and longevity. By performing a thorough evaluation, you can identify any cracks, cuts, loose threads, or buckle damage that may require repair or maintenance.
Inspecting for Cracks and Cuts
Begin by carefully examining the surface of your leather belt for any visible cracks or cuts. These may occur due to heavy and repetitive use or accidental damage. Look closely at both sides of the belt, ensuring no areas are overlooked. Cracks and cuts can weaken the structural integrity of the belt and compromise its performance.
Checking for Loose Threads and Buckle Damage
Next, inspect the stitching of your weightlifting belt for any loose threads or frayed edges. Give particular attention to areas where the belt experiences the most stress, such as around the buckle or near the holes. Loose threads can indicate wear and tear and may require re-stitching to prevent further damage.
Additionally, examine the buckle of your belt for any signs of damage. Check for cracks, dents, or misalignments that may affect its functionality. A damaged buckle can compromise the secure fit of the belt and may need to be repaired or replaced.
Regularly evaluating the condition of your worn leather weightlifting belt ensures that you catch any issues early on, allowing for timely repairs and maintenance. Addressing these problems promptly will help extend the lifespan of your belt and keep it in optimal condition for your weightlifting routine.
Fixing Small Tears and Cracks in Leather Weightlifting Belts
Small tears and cracks are common issues that weightlifters may encounter with their leather belts. However, with the right tools and techniques, these problems can be easily fixed, allowing you to continue using your belt without any compromises in performance or safety.
Cleaning and Preparing the Area
The first step in fixing small tears and cracks is to clean and prepare the damaged area. Start by gently wiping the surface of the belt with a damp cloth to remove any dirt or debris. Avoid using harsh chemicals or abrasive cleaners, as they can further damage the leather.
Once the surface is clean, use sandpaper with a fine grit to smooth the edges of the tear or crack. This will create a clean and even surface for the repair compound to adhere to. Be careful not to sand too aggressively, as it can cause further damage to the belt.
After sanding, wipe the area again with a damp cloth to remove any leftover dust or particles. Allow the belt to dry completely before proceeding to the next step.
Applying a Leather Repair Compound
With the cleaned and prepared area, it’s time to apply a leather repair compound. This compound is specifically designed to bond with the leather and create a strong and flexible seal.
Start by following the manufacturer’s instructions for the specific repair compound you are using. Apply a small amount of the compound to a clean and dry cloth. Gently work the compound into the tear or crack, making sure to fill it completely. Use a smooth and consistent motion to ensure an even application.
Once the repair compound is applied, use a soft cloth or your finger to smooth out any excess and blend it with the surrounding leather. This will create a seamless and natural finish. Allow the repair compound to dry completely, following the recommended drying time provided by the manufacturer.
After the repair compound is dry, inspect the area to ensure the repair is secure and properly blended with the rest of the belt. If necessary, apply another layer of repair compound and repeat the drying process.
By following these steps, you can effectively fix small tears and cracks in your leather weightlifting belt, restoring its strength and durability. Remember to always take care of your belt to prevent future damage and ensure its longevity.
| Steps to Fix Small Tears and Cracks in Leather Weightlifting Belts |
|---|
| Clean the belt with a damp cloth to remove dirt and debris |
| Use fine-grit sandpaper to smooth the edges of the tear or crack |
| Wipe the belt again with a damp cloth to remove leftover dust |
| Allow the belt to dry completely before proceeding |
| Apply a leather repair compound according to the manufacturer’s instructions |
| Fill the tear or crack completely with the repair compound |
| Smooth out any excess compound with a soft cloth or finger |
| Allow the repair compound to dry completely |
| Inspect the area for a secure and well-blended repair |
Leather Belt Conditioning: Prolonging the Life of Your Weightlifting Gear
Proper leather belt conditioning is essential for maintaining the quality and durability of your weightlifting gear. Conditioning helps prevent the leather from becoming dry, brittle, or cracked, and it also enhances the overall performance and comfort of your belt. In this section, I will discuss the importance of leather belt maintenance and provide recommendations for the best products and techniques to keep your weightlifting belt in optimal condition.
When it comes to leather belt maintenance, using high-quality conditioning products is key. Look for leather conditioners specifically designed for weightlifting belts, as they are formulated to nourish and protect the leather effectively. These conditioners penetrate the leather to moisturize and restore its natural oils, preventing it from drying out and losing its strength.
One highly recommended leather conditioner for weightlifting belts is the Lexol Leather Conditioner. It is a trusted brand known for its superior conditioning capabilities. To use the conditioner, simply apply a small amount to a clean cloth and rub it into the leather using gentle circular motions. Allow the conditioner to be absorbed by the leather for a few minutes before buffing off any excess with a clean cloth.
Regular conditioning sessions are crucial for maintaining the suppleness and longevity of your weightlifting belt. Aim to condition your belt at least once every three months or more frequently if you use it regularly or live in a dry climate. By incorporating this simple yet effective maintenance routine into your weightlifting gear care regimen, you can ensure that your belt remains in top condition for years to come.
In addition to using leather conditioners, there are a few other techniques you can employ to prolong the life of your weightlifting belt:
- Regularly clean your belt with a damp cloth to remove dirt, sweat, and oils that can accumulate on the surface.
- Avoid exposing your belt to excessive moisture or direct sunlight, as these can cause the leather to deteriorate.
- Store your belt in a cool, dry place when not in use to prevent it from becoming warped or damaged.
By following these leather belt maintenance practices and incorporating regular conditioning sessions, you can ensure that your weightlifting belt remains in peak condition, providing optimal support and performance during your workouts.
Customizing Your Repair to Match Brand-Specific Design
Different brands of weightlifting belts may have specific design features or materials. When repairing your weightlifting belt, it’s important to customize the repair to match the brand-specific design. This ensures that your repaired belt retains its original quality and integrity. In this section, I will provide guidance on customizing the repair for popular weightlifting belt brands such as Rouge, SBD, Gunsmith, Genghis Fitness, Dmoose, and Gymreapers.
Working with Rouge Weightlifting Belts
If you own a Rouge weightlifting belt, you’ll want to ensure that your repair seamlessly matches its design. Follow these steps to customize your repair for a Rouge belt:
- Carefully examine the belt to identify any unique design elements, such as logo placement or stitching patterns.
- Source materials that match the original design, such as the same color of leather or thread.
- When applying the repair compound, pay close attention to the details of the belt’s original construction.
- After the repair is complete, use leather conditioner specifically recommended for Rouge belts to maintain the belt’s quality.
Addressing Specifics of SBD and Gunsmith Belts
SBD and Gunsmith are popular brands known for their quality weightlifting belts. If you own an SBD or Gunsmith belt, here are some brand-specific considerations to keep in mind during the repair:
- Match the original belt thickness when applying the repair compound.
- Ensure the repaired area seamlessly blends in with the rest of the belt’s color and texture.
- Use a durable thread that matches the original stitching to maintain the belt’s strength and integrity.
- Condition the repaired area with products recommended by the brand for optimal performance.
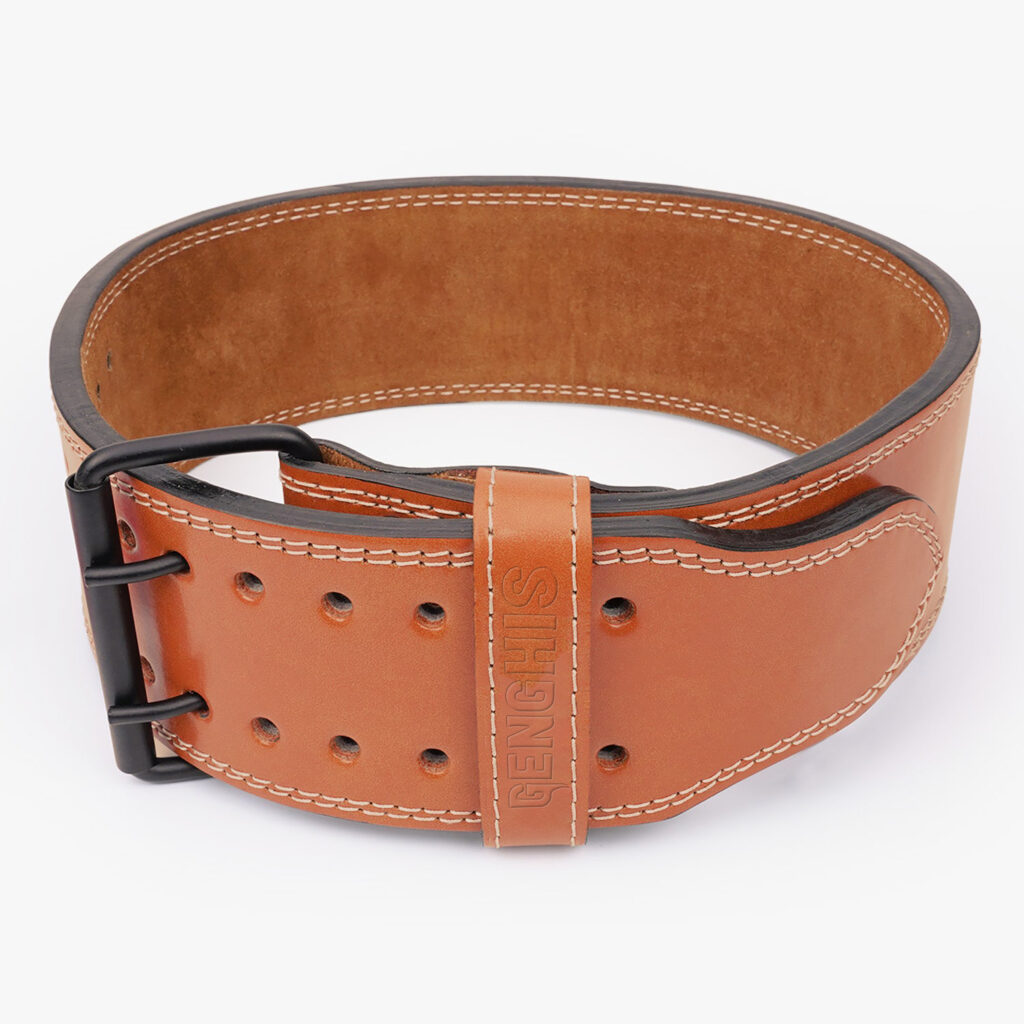
Ensuring Genghis Fitness, Dmoose, and Gymreapers Belts Retain Quality
Genghis Fitness, Dmoose, and Gymreapers are popular brands that offer high-quality weightlifting belts. To ensure that your repair maintains the quality of belts from these brands, follow these steps:
- Familiarize yourself with the unique design elements of each brand, such as logo placement or specific buckle design.
- Source materials that closely match the original belt to achieve a cohesive repair.
- Take note of any specific repair techniques recommended by the brand to ensure optimal results.
- Apply the repair compound with precision and attention to detail, considering the brand’s construction and stitching patterns.
- After the repair is complete, condition the repaired area with the recommended products to maintain the belt’s quality and longevity.
When to Seek Professional Help for Leather Belt Repair
While DIY repairs can be effective for many common issues with leather weightlifting belts, there may be situations where professional help is necessary. Depending on the extent of the damage or the complexity of the repair needed, it’s important to recognize when it’s time to consult an expert in weightlifting gear repair.
Here are a few signs that indicate it may be best to seek professional assistance:
- If the damage is extensive, such as a large tear or complete separation of the leather layers.
- If you lack the necessary skills or experience to confidently fix the belt on your own.
- If the repair requires specialized tools or materials that you don’t have access to.
- If you’re unsure about the best approach to repairing a specific issue with your belt.
When deciding to seek professional help, it’s essential to find a reputable leather repair expert who specializes in repairing gym equipment. Look for reviews or ask for recommendations from fellow weightlifters or fitness professionals to ensure you choose a reliable and experienced professional.
Remember, investing in professional repairs can save you from potential mistakes or further damage to your weightlifting belt.
Whether you opt for a DIY repair or seek professional assistance, the most important thing is to address any issues with your leather weightlifting belt promptly. By taking proper care and optimizing the lifespan of your weightlifting gear, you can continue to enjoy the support and benefits it provides during your workouts.
Tips and Tricks for DIY Weightlifting Belt Repair Enthusiasts
If you’re a DIY enthusiast looking to take your weightlifting belt repair skills to the next level, I have some valuable tips and tricks to share with you. These insider insights will help you enhance your repair techniques, implement preventative maintenance measures, and get creative with customization options. With these expert tricks up your sleeve, you’ll become a skilled weightlifting belt repair enthusiast in no time.
To begin, let’s explore some advanced repair techniques that can elevate your DIY projects. When dealing with more significant damage, consider using leather patches to reinforce weak areas. By carefully sewing or gluing these patches onto the damaged sections, you can provide added strength and durability to your repaired belt.
Another useful tip is to utilize leather dye or paint to match the color of your weightlifting belt when conducting repairs. This step ensures a seamless finish and eliminates any noticeable differences between the repaired and original sections of the belt. Remember to properly clean and prepare the area before applying any dye or paint for optimal results.
Now, let’s move on to preventative maintenance measures. It’s crucial to regularly inspect your weightlifting belt for signs of wear and tear. By identifying and addressing minor issues early on, you can prevent them from escalating into larger problems. This includes checking for loose stitches, weak spots, and signs of stretching or deformation.
Additionally, consider applying a leather conditioner or oil to your weightlifting belt every few months. This helps keep the leather supple, moisturized, and less prone to cracking or drying out. Be sure to use a conditioner specifically designed for leather to avoid damaging your belt.
Finally, let’s explore some creative customization options for your weightlifting belt. Personalizing your gear can not only make it unique but also motivate and inspire you during workouts. Consider adding custom stitching, embossed patterns, or even attaching patches or badges that reflect your personality or achievements.
Remember, DIY weightlifting belt repair is a journey of continuous learning and improvement. By incorporating these tips and tricks into your projects, you’ll develop a deeper understanding of leather repair techniques, enhance the longevity of your belts, and showcase your creativity along the way.
Conclusion
In conclusion, repairing a leather weightlifting belt is a cost-effective and rewarding endeavor. By engaging in regular maintenance and addressing any issues promptly, you can prolong the life of your weightlifting gear and optimize its performance. It is important to inspect your belt regularly for tears, cracks, loose threads, and buckle damage, as these issues can worsen over time. With the right tools and materials, you can easily fix small tears and cracks in your leather belt, ensuring its durability.
DIY repairs not only save you money but also provide a sense of accomplishment and satisfaction. Taking the time to learn how to repair your weightlifting belt allows you to take control of maintaining your gym equipment. By following the step-by-step guide provided in this article, you can confidently repair your leather weightlifting belt and restore it to its original functionality.
I encourage you to embrace the challenge of DIY repairs and make it a part of your weightlifting journey. By following the guidelines outlined in this article, you can become proficient in fixing weightlifting belts and customize repairs to match brand-specific designs. Remember, taking care of your weightlifting gear is not only about functionality but also about preserving the quality and integrity of your equipment. So, invest in the necessary tools and materials, commit to regular maintenance, and enjoy the long-lasting benefits of a well-maintained weightlifting belt.